
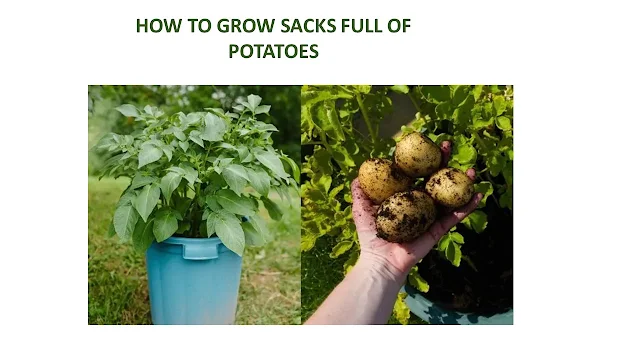
Grow sacks full of potatoes
Strangely, potatoes are often overlooked when growing a vegetable garden.
Obviously, some people are under the impression that there is really no reason to grow them because they are so cheap to buy and, really, how much difference can there be in taste?
But it can not be wrong.
Additionally, those spouts that are grown commercially will easily last a year by the time they arrive at your local supermarket. That’s why if you take them home, they usually only take a few weeks to start germinating.
So, what you eat is much less than fresh vegetables. But, if you grow them on your own and store them properly, the potatoes will last for many months, while at the same time being fresher than what you bought in the store.
Like most things, home-grown potatoes are actually quite tasty.
Although potatoes are often considered a convenient food, they actually provide a lot in a nutritious way.
1. 100 pounds of potatoes in just four square feet
An article published in the Seattle Times a few years ago discussed growing 100 pounds of potatoes in four square feet.
All you need for this technique is some wood, seed potatoes, horticultural soil, and of course a lot of love and care. The guide to creating it can be found here and is shown below.
The recommended planting time is early April and August 1st and is three months before harvest. Includes some tips for using this technique
2. Trash bag potatoes
Growing potatoes in a garbage bag is practically a foolish way of growing potatoes and only takes a few simple steps to do so.
Method
One week before planting, place your seed potatoes in a warm place. When the sprouts have grown to a quarter of an inch to half an inch, they are ready for planting.
Cut large seed potatoes into pieces approximately two inches wide. Each piece should have at least two sprouts. After cutting the seed potatoes, allow sitting for three days at room temperature.
Using a pair of scissors, cut a few drain holes in the bottom of the 30-gallon plastic garbage bag. Roll down the sides of the bag and fill it one-third full with soil.
Now, place the trash bag in the full sunlight area of your garden.
To plant your seed potatoes, first, dust them with agricultural sulfur to protect them from fungal diseases. Raise the eyes to a depth of two inches in the soil and bury them and plant them. Water well.
When your potato plants are six to eight inches high, add more soil and straw to the bag. There should be enough soil so that some of the top leaves pierce through it.
As they continue to grow, unpack the trash and add more soil accordingly. They should be well watered, but not wet.
Now the fun part: harvest time. One clue that your potatoes are ready for harvest is that the leaves will turn yellow and the leaves will die again.
3. Business Development Bags
You can also use commercial development bags made from heavy, dense polypropylene.
Although they are slightly more expensive than garbage bags, they usually last for several growing seasons. You can buy five-pack potato growing bags from this page on Amazon, and some options are given below.
To use them, place a few inches of the soil-fertilizer mixture on the bottom of a bag and then plant four seed potato pieces. Cover them with three inches of soil. Continue adding soil as the potato plants grow until the pie is completely filled.
To harvest, all you have to do is turn the bag over to its side and pour out the contents. Considering the relatively small space, the yield is generally quite impressive.
4. Planting in the ground with straw mulch
This method is a very simple one if you have space in your garden.
All you have to do is place your seed potatoes 8 to 12 inches above the surface of the prepared garden soil. You can cut larger ones if you want, but it is not necessary.
Now, cover them with three to four inches of loose straw. Once the stems have grown to a height of about 8 inches, add a little more straw.
Repeat until the plants reach a height of about 3 feet and a layer at least a foot deep. When the tops start to die, it is time to harvest.
When thick mulch suppresses any weeds Using this technique can be very effective as it works to protect the soil moisture.
When it comes to harvesting, it is practically hassle-free and requires no digging. This method is also recommended to prevent Colorado potato beetles
5. Bucket potatoes
Potatoes are so easy to grow that they can actually be grown in any variety.
A garbage bag will work, but a 5 to 10-gallon bucket will work. Five-gallon buckets are best because you can easily start them indoors and then carry them back and forth depending on the weather.
A bucket (preferably a 5-gallon bucket)
Small rocks or pebbles (aquarium pebbles work well)
Potting soil
A black garbage bag
Seed potatoes (you can buy some at your local home and garden center or use the potatoes you have if you are just starting to grow roots)
Method
First, add rocks or pebbles to the bottom of your bucket to allow drainage. Cover the bottom 1 to 2 inches to ensure proper drainage.
Fit it into the bucket by opening your trash bag and placing it inside. You have to cut it to reach an inch overhang. Using your scissors, make a cut to mark it, and then place the trash bag on the floor. Cut a straight line out of the bag and then place it back in the bucket. Drill about 20 drain holes.
After placing the trash bag, add about 4 to 5 inches of potting soil to the bottom of your bucket.


1 Comments
Enjoy reading the article above, it really explains everything in detail about herb garden planter box, the article is very interesting and effective. Thank you and good luck with the upcoming article
ReplyDelete